Weaving lessons for beginners
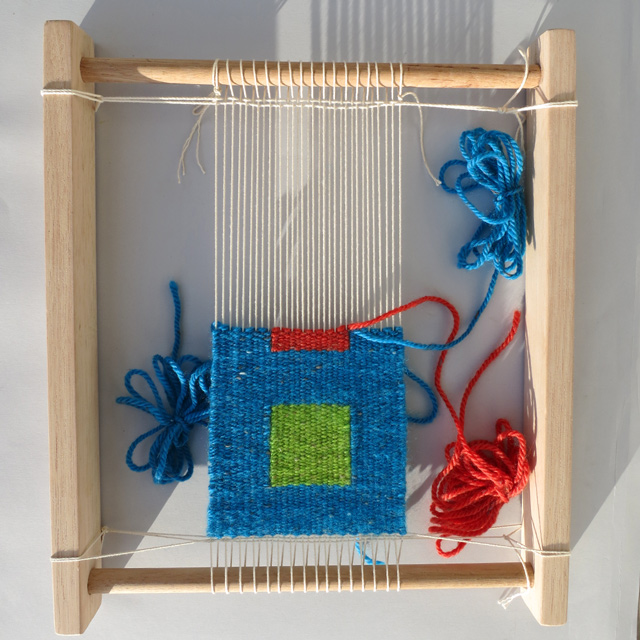
I recently launched my new YouTube Channel – weavewithpat – with a collection of videos aimed at the absolute beginner weaver. Here are some snaps from video production.
Weaver fever
A recent rediscovery of weaving has kept me away from my knitting needles and crochet hooks over the last few months.
My mother, Marta, was a fantastic tapestry weaver. Weaving is what started her on her journey of dyeing yarns. She couldn’t find the colors she needed for her weaving projects so started to dye yarns in her laundry room. This led to the Marta’s Yarn collection of hand dyed knitting yarns.
I recall helping her make her large circular weavings in the late 70s where we used a bike wheel as a loom. The spokes where the warp.
In memory of mum and as part of my renewed interest in this ancient craft. I have launched a new YouTube channel weavewithpat with a series of videos demonstrating the basic weaving techniques.
I will also be selling beginners weaving loom kits with everything you need to get started with you first weaving project.
Pat xx
Knitting Tutorial: How to slip a stitch
One of the most common questions I have had from knitters just starting out is how do you slip a stitch in your knitting.
It seems straight forward and it is. As long as you make sure to slip it properly.
Watch my new YouTube tutorial to see how to slip a stitch without twisting it. And also how to twist it if you want to.
Produced in super slow motion. Enjoy.
Basic Knitting stitches: Garter stitch
Garter stitch is probably the first stitch pattern you learned when you started knitting. It is perfect for your first scarf as it sits flat and is super simple.
The basic pattern for knitting garter stitch on straight needles is to knit every stitch of every row. To knit garter stitch in the round alternate between one round of knit stitches and one round of purl stitches.
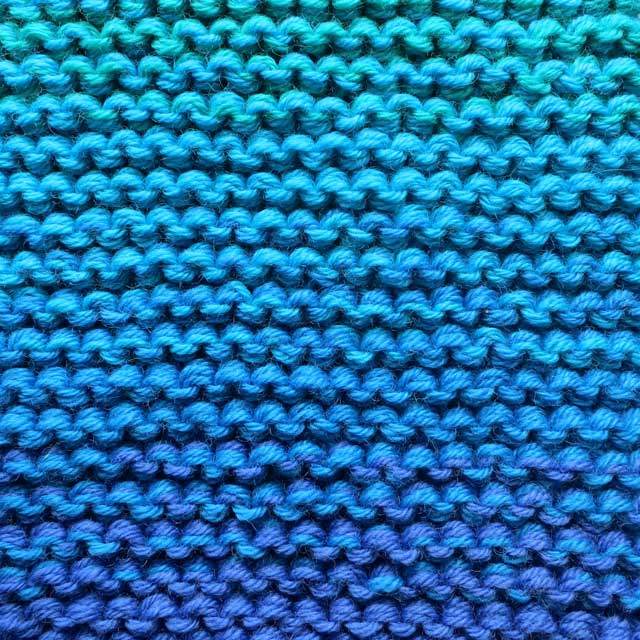
A simple way to count garter stitch rows is to count two rows for every ridge. The sample above was knitted by alternating four rows of each colour. To avoid a line showing up when changing colours in a striped pattern, always change colour at the beginning of an odd numbered row.
As the garter stitch is square in shape, you will be able to knit a square by knitting the same number of rows as the number of stitches you cast on.

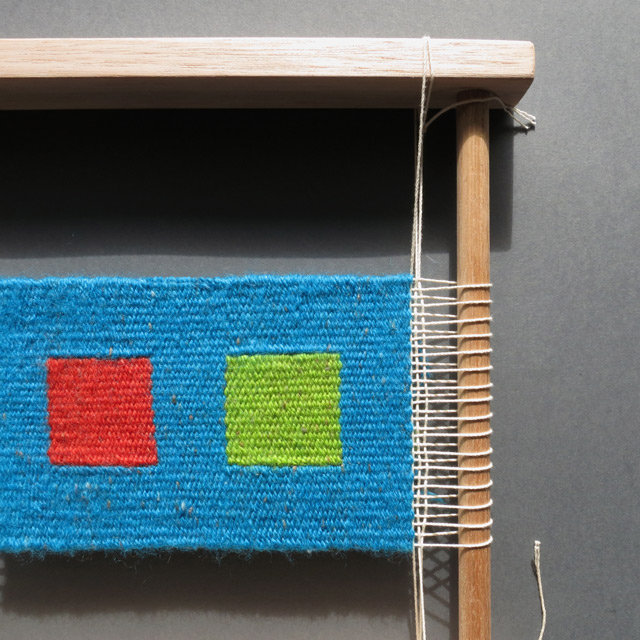
See my video tutorial on Garter stitch Intarsia if you want to learn how to make colour changes in the middle of a row of garter stitch. This technique allows you to make lovely color blocks like the one above and the shapes in my Tangram Square Blanket design.
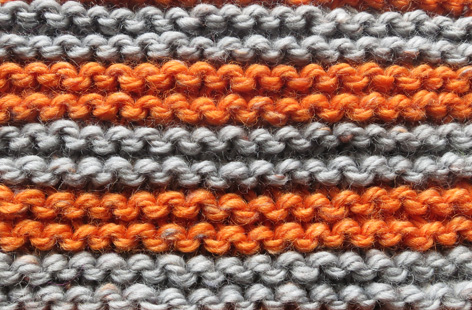
The first sample was made with the Metro yarn in shades ranging from Blue to green and the second and third samples with the Retro yarn in Persian Orange and Silver shades
Knitted Bracelets
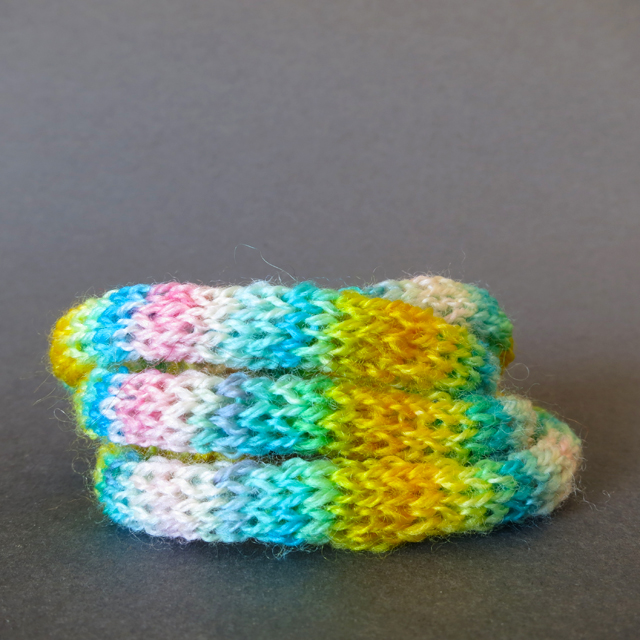
Things have been warming up down here in the Southern Hemisphere so I haven’t really felt like knitting scarves. Instead I have made some cheerful knitted bracelets using the Merino Wool Lace weight mini skeins.
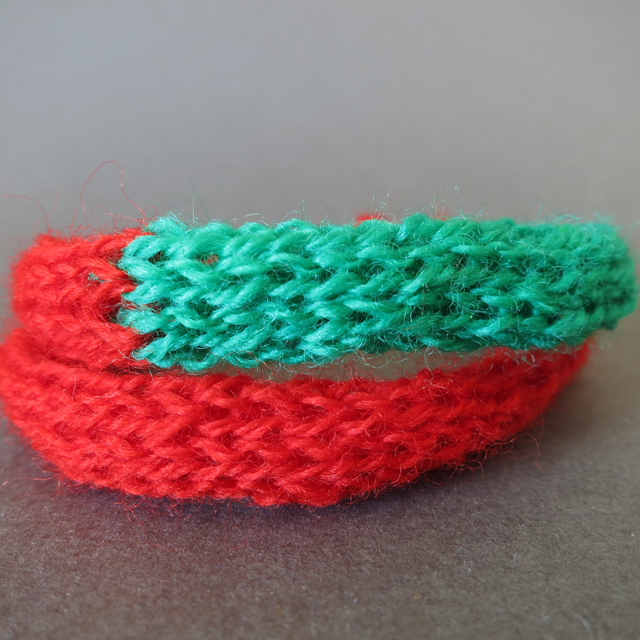
They don’t take long and you get about 65cm of length (length of spring mix in first photo above) with one skein using the pattern below.
Using 3mm knitting needles cast on 2 stitches.
Row 1 – Knit into the front and the back of the two stitches (4)
Row 2 – Purl
Row 3 – Knit into the front and the back of the four stitches (8)
Row 4 – Purl
Row 5 – Knit
Repeat rows 4 and 5 until you reach the required length – ending with a purl row.
Second last row – Knit 2 together four times (4)
Last row – Purl two together two times and then pass the second stitch over the first stitch and tie off.
Enjoy!
We have a winner!
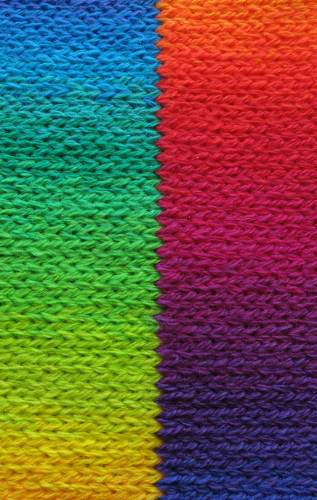
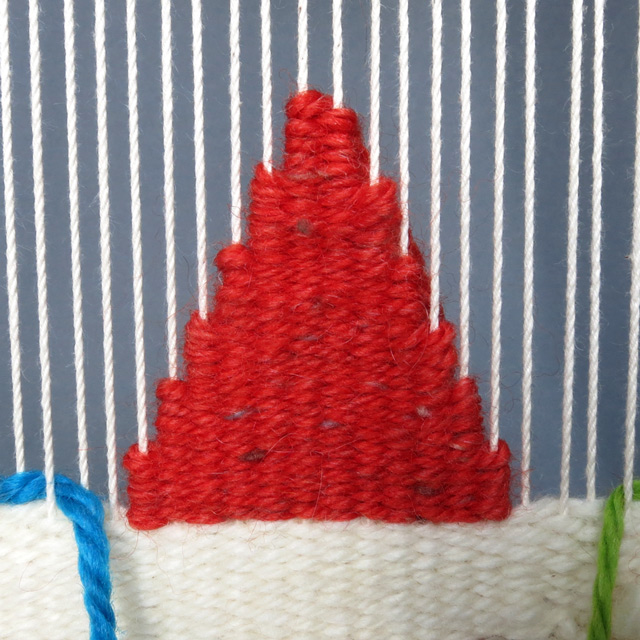
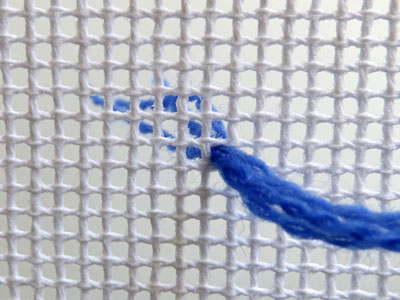
Louise from Australia is the winner of the mystery Blue/Green study. Louise correctly identified the technique as an embroidery technique – known as the knitting stitch – performed on needlepoint canvas. Here is a picture showing the piece and the canvas.
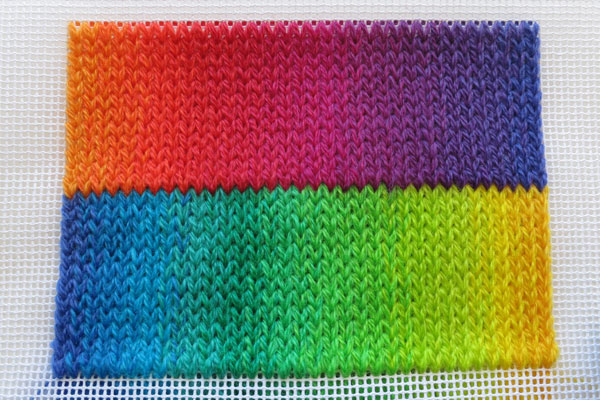
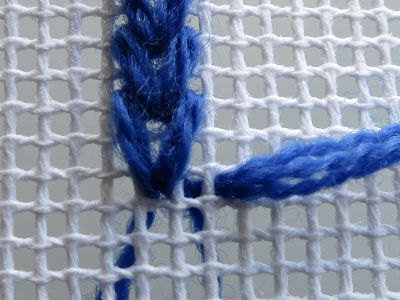
The specific technique I used to create this piece was a modified knitting embroidery stitch on needlepoint canvas (12:1) using three strands of the Lace weight merino yarn. As this embroidery stitch is made in columns it allows you to graduate colours vertically easily.
I graduated in three steps (columns) to the next colour and so on around the rainbow. The original knitting embroidery stitch is 4 squares high. But, I thought it looked too long compared with actual stocking stitch so I modified it be 3 squares high.
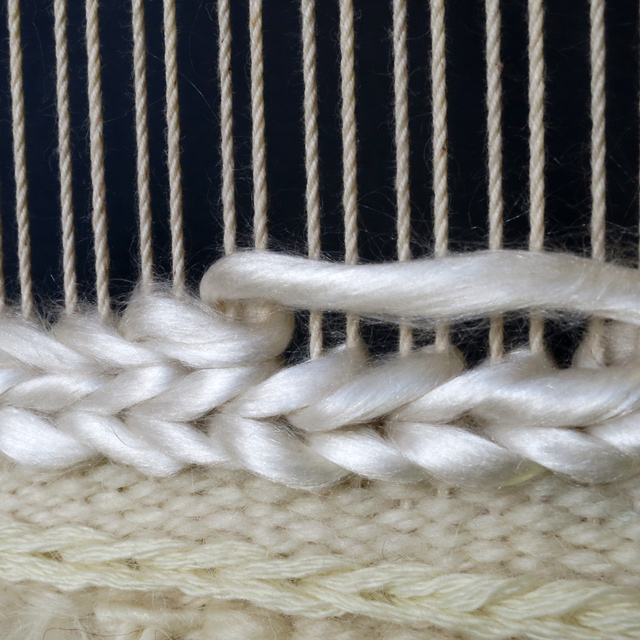
Below is a step by step photo tutorial on how to make the stitch.
Louise will be receiving the prize of her 5 favorite colours in the Marta’s Yarns mini skein range. Also, as a special thank you to everyone who participated in my first online competition, all submitters will be emailed a 20% discount coupon code for an order from the Marta’s Yarns collection of knitting yarns.
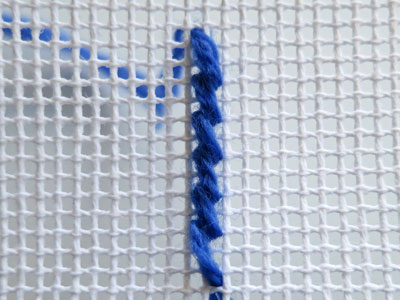
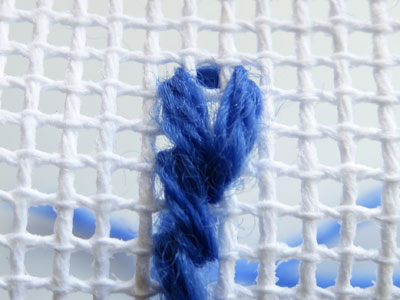
Step 1 – Commencing at the bottom left corner of the area you wish to embroider, bring three strands of the lace weight yarn up through a square in the canvas. We will be working the pattern from left to right so make sure you allow enough space to the right of your starting point.
Step 2 – Insert the needle three squares up and one square to the left.

Step 3 – Bring needle up one square down and one square to the right.
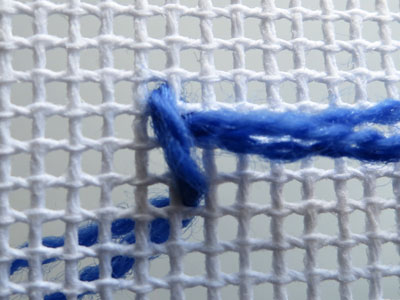
Step 4 – Repeat steps 2 and 3 until you have the desired column height, ending with step 2.
Step 5 – Bring needle up two squares to the right.
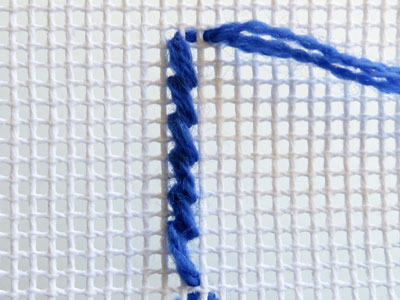
Step 6 – Insert the needle three squares down and one square to the left.
Step 7 – Bring needle up one square up and one square to the right. Repeat steps 6 and 7 until you are at the end of the column.
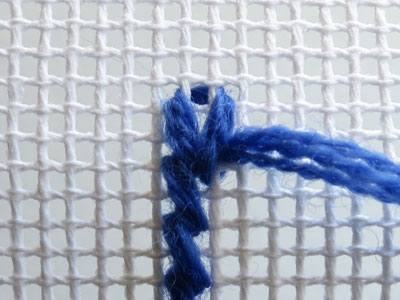
Step 8 – To start a new column in the same colour bring the needle up two squares to the right.
Final clue
Another 24 hours has passed and still no progress on cracking this mystery technique. Here are some more of the suggestions that have been submitted – tunisian crochet, dip dyeing a knitted piece, circular knitting and various stranding techniques.
So I will give you one last clue and if no one works out the technique by tomorrow lunch time – Melbourne time – I will reveal the technique and give the prize to the most imaginative suggestion made.
The CLUE – The Blue/Green study was not knitted or crocheted but stranding is used carefully to achieve the color graduation. I used the Lace weight merino mini skeins collection – read the title of the page for another clue.
Here is an image of the completed piece – now called Rainbow Merino Study.