We have a winner!
Louise from Australia is the winner of the mystery Blue/Green study. Louise correctly identified the technique as an embroidery technique – known as the knitting stitch – performed on needlepoint canvas. Here is a picture showing the piece and the canvas.
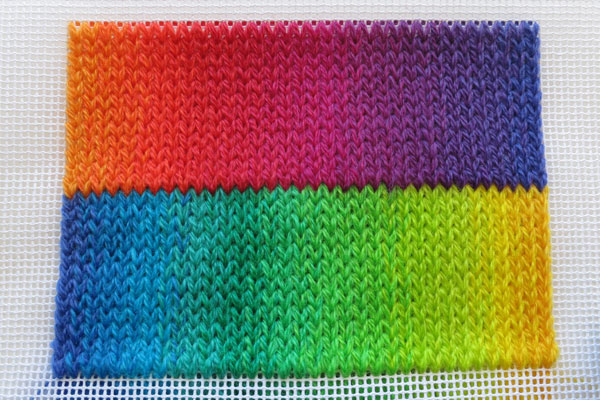
The specific technique I used to create this piece was a modified knitting embroidery stitch on needlepoint canvas (12:1) using three strands of the Lace weight merino yarn. As this embroidery stitch is made in columns it allows you to graduate colours vertically easily.
I graduated in three steps (columns) to the next colour and so on around the rainbow. The original knitting embroidery stitch is 4 squares high. But, I thought it looked too long compared with actual stocking stitch so I modified it be 3 squares high.
Below is a step by step photo tutorial on how to make the stitch.
Louise will be receiving the prize of her 5 favorite colours in the Marta’s Yarns mini skein range. Also, as a special thank you to everyone who participated in my first online competition, all submitters will be emailed a 20% discount coupon code for an order from the Marta’s Yarns collection of knitting yarns.
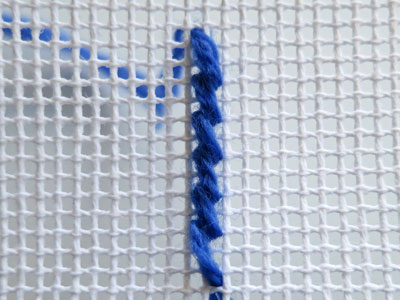
Step 1 – Commencing at the bottom left corner of the area you wish to embroider, bring three strands of the lace weight yarn up through a square in the canvas. We will be working the pattern from left to right so make sure you allow enough space to the right of your starting point.
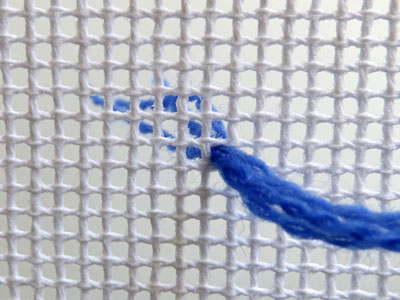
Step 2 – Insert the needle three squares up and one square to the left.

Step 3 – Bring needle up one square down and one square to the right.
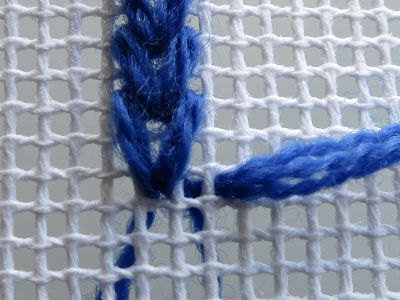
Step 4 – Repeat steps 2 and 3 until you have the desired column height, ending with step 2.
Step 5 – Bring needle up two squares to the right.
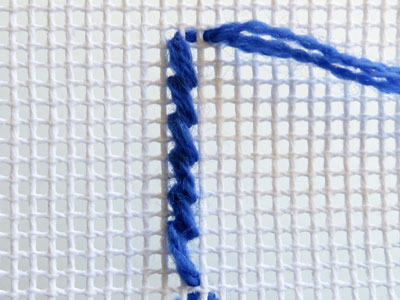
Step 6 – Insert the needle three squares down and one square to the left.
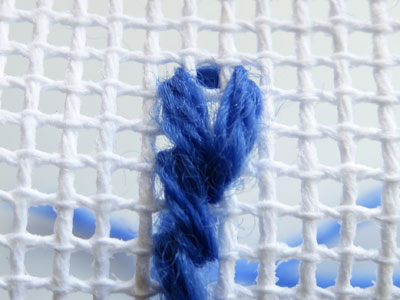
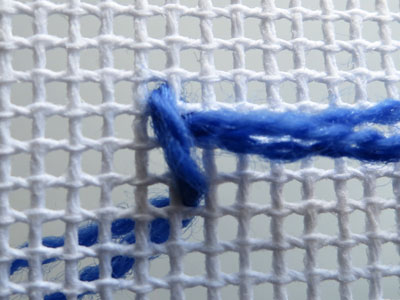
Step 7 – Bring needle up one square up and one square to the right. Repeat steps 6 and 7 until you are at the end of the column.
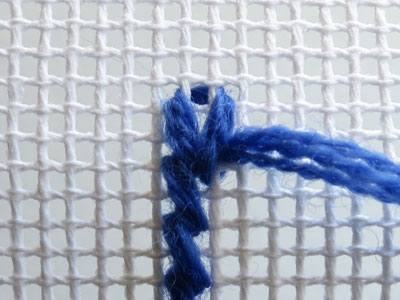
Step 8 – To start a new column in the same colour bring the needle up two squares to the right.